When going on a nature trip or picnic, it saves a lot of time on the day of the trip if you print out a topographical map of the area you are going to and determine where and how you will go before you go. Also, you can check whether you are going right or wrong, plan and go with peace of mind. You're resting, aren't you, 😅😂.
- Select the map according to your application
- Choose the appropriate size of the image and other comments
- How to use
There are many types of maps (cards = henceforth abbreviated to Maps, 2-mountains may also be used). It is good for us to choose the right card for our needs and learn to use it correctly. For example, when you're driving in a remote part of the West Mountain Road, a city sightseeing map may not be very helpful.
Now let's briefly mention the cards that are widely used.
Select the map according to your application
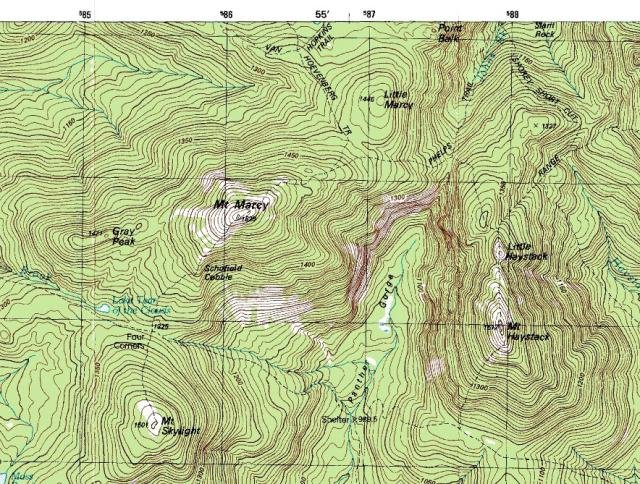
Topographic map or Topographic map
Learning to read it is one of the most important skills for a hiker. This image shows detailed information about the area, roads, scenic spots, distant places and distances between them.
Road map
This picture is your reliable partner on the motorized road. These are essential when traveling without GPS. However, you will need a helper by your side to guide you with the help of a map,😉.

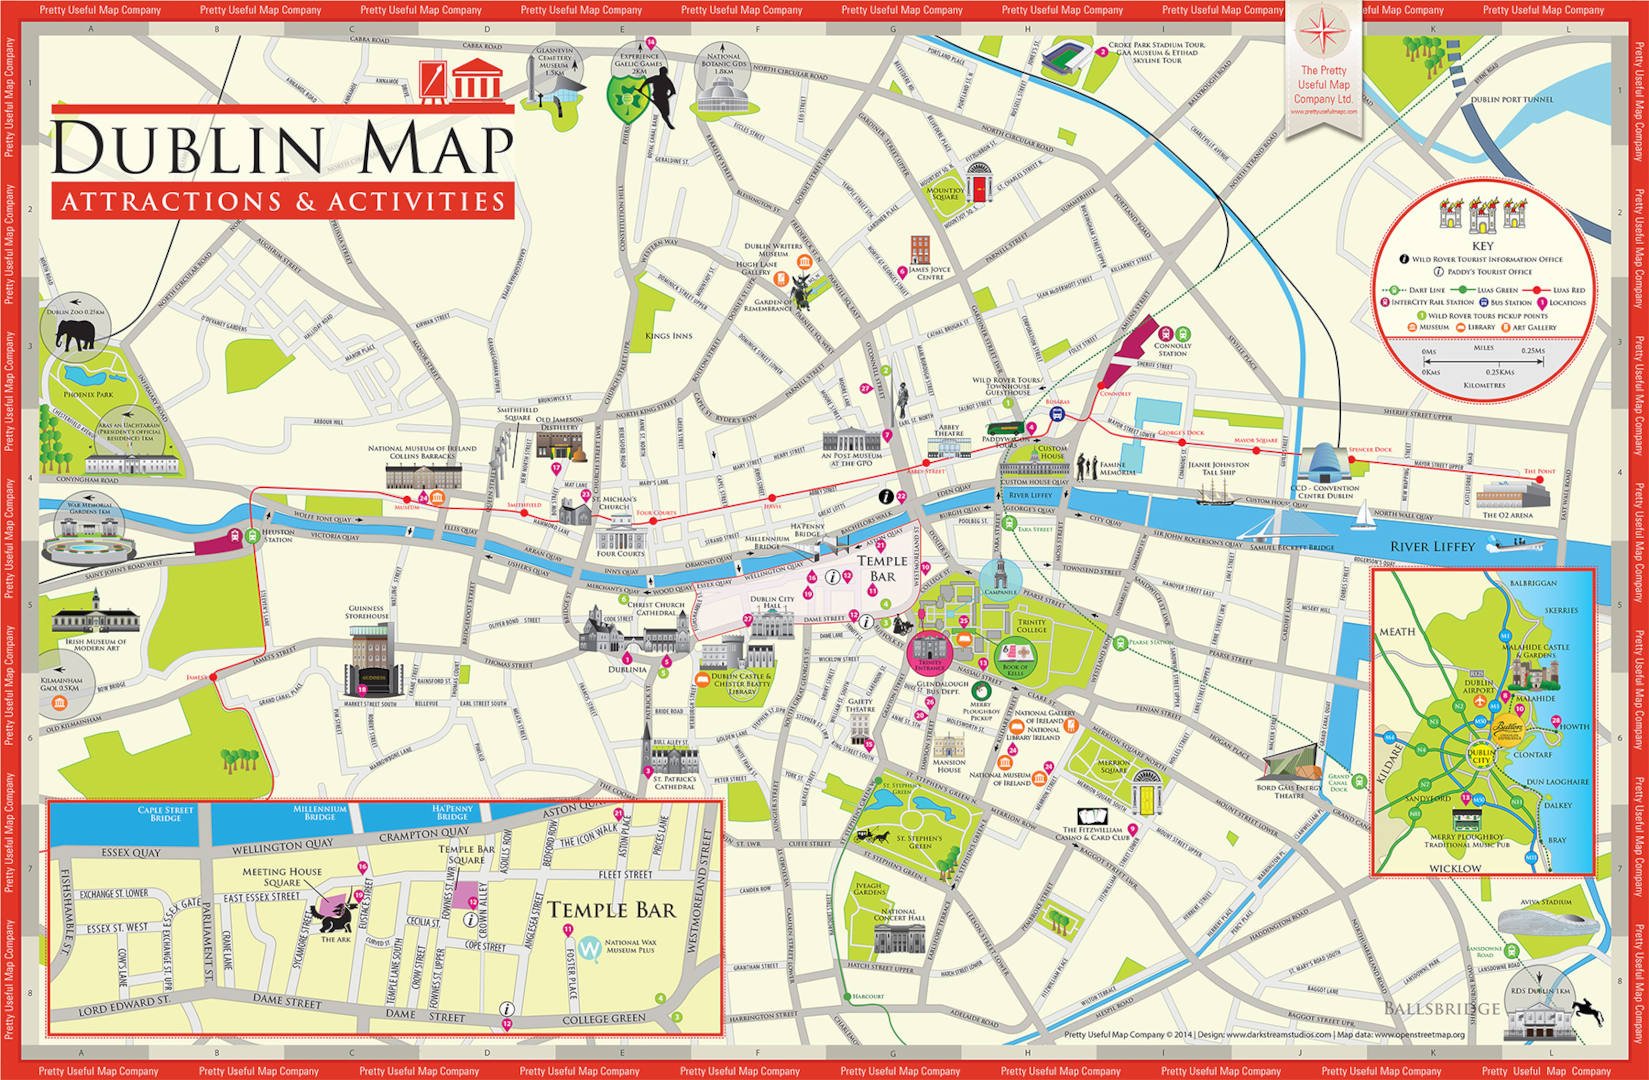
City map for tourists
If you are traveling in a big city, it is very useful to have a tourist map. This map shows the most important sights and attractions of the city. They are usually available for free at tourist information offices or hotels and hostels.
Choose the appropriate image size and other comments
1:50.000
Hiking maps are usually at a scale of 1:50,000. This means that one centimeter on a map is actually 50,000 centimeters (or 500 meters).
The map is divided into linear grids. Each of these grids (or grid squares, boxes) is about two centimeters long. So, each of these squares actually corresponds to one kilometer, which is very useful for directly calculating the distance between a point and a location.
1:25.000
More detailed maps use a scale of 1:25,000 (1 centimeter = 250 meters). Each square actually represents 500 meters. If you notice, it is twice as big as before, 🤓.
These more detailed maps show trees, rocks, and other features of the terrain.
Understanding the different elements of a card and their function is essential to improving your card reading skills. A description of the card's main components is listed below.
Legend or explanation
The legend shows and explains the elements and symbols abbreviated to all the different icons on the map.
Title
The title of the map shows the name of the part of the land depicted on the map.
Reference Network
The map is divided into mesh boxes and grids. The first two digits (or three, depending on accuracy) represent the value on the X axis, and the last two (or three more) represent the Y value. Each search point starts with a letter given on the card.
North Arrow
This arrow shows which direction is north on the map. This is very important data for determining your location (more on how to use it below).
Scale
It indicates the ratio to reality, for example, 1:25,000 or 1:50,000, etc. As written above, it determines how long the distance on the ground is shown in the figure.
Sequence of how to use ...
1. Orient the map to the north
To orient the map to north, place the compass flat on the map and rotate it until the compass needle points north. Very easy.

2. Find your position on the map
The most important thing in determining your position on the map is to relate your surroundings to the map. At the beginning of a hike, you may not know exactly which square grid corresponds to your location. Therefore, it is advisable to start your hike from a place that can be easily recognized (unique landmarks, rocks, forests, bushes, ravines, steep ascents, etc.).
If you pass through a town or village on your way to the starting point of the hike, look for it on the map and try to retrace your route from there.
A reference point can be mountains, rivers, walls, foothills, roads, etc. If you can clearly see the three elements in your surroundings and find them on the map, you can be sure that you have determined your position.
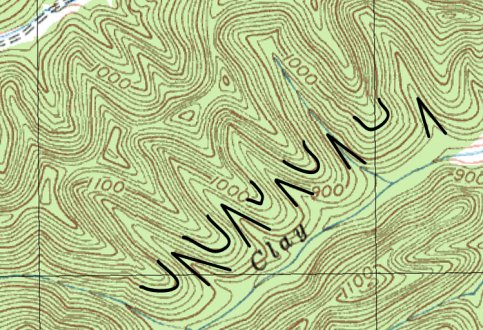
3. Reading contour lines
Contour lines are usually black or red lines that run across the map. In some drawings, these contour lines have small transverse lines, which is the same expression as a hollow on the inside and a concentric or mountain on the outside. Alternatively, the height data can be defined as concave or concave by its rise and fall.

Each contour line on the 1:50,000 scale map represents ten meters of elevation above sea level. Every fifth line is printed a little thicker, which makes it easier to distinguish and count the contour lines from each other, for example, if you want to determine the ascent and see several lines at once.
The closer the lines are to each other, the steeper the slope. Therefore, you can use contour lines to plan your route along a shallow slope and save unnecessary load. Of course, if you climb steeply, you will save time, but it will require a lot of effort.
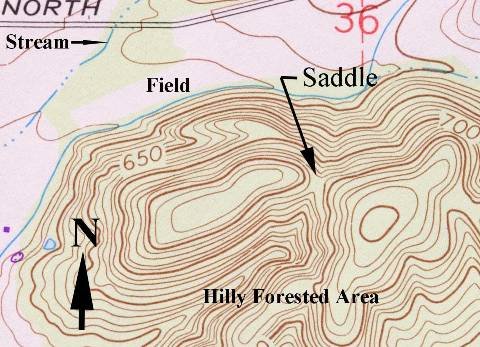
4. Identify the characteristics of your environment
The foot of the mountain
A foothill is a landscape element that slopes down on three sides and rises on one side. See the map view below...
Mountain Peak
The peak of the mountain will naturally be the innermost center point where the contour line is reduced. In the picture below, for example, a peak with 2 conjoined heads is depicted. On the other hand, if the elevation data has a minus sign, it will be a depression or its lowest point, not a mountain. Some old paintings also have small cross lines drawn on each contour line. If it's going out, it's giving, if it's going in, it's going down.
Conclusion
Nephew, this time I will briefly mention how to read a map. In general, it gets better with use. Why print before the trip, when there are many equipment? Yes, whatever happens on the road, you'll always have an endless supply of guides, 😘. When traveling in Europe, you should first visit hotels, city halls, and tourist centers. Useful information, such as printed maps, is readily available for free or at low cost. Asking and talking is the easiest way to save time, 🤓😎.
Note: In some countries, you will encounter scammers who will show you cheap, easy, and quick things (you will lose time, sell more money, and become dissatisfied). Learn to inquire and ask at their centers without wasting time!